Restoration
Home ] Carving ] Signs ] Pattern Making ] Turning ] [ Restoration ] National Archives ] Bagpipes & Bellows ] Sculpture ] Bellamy Eagles ]


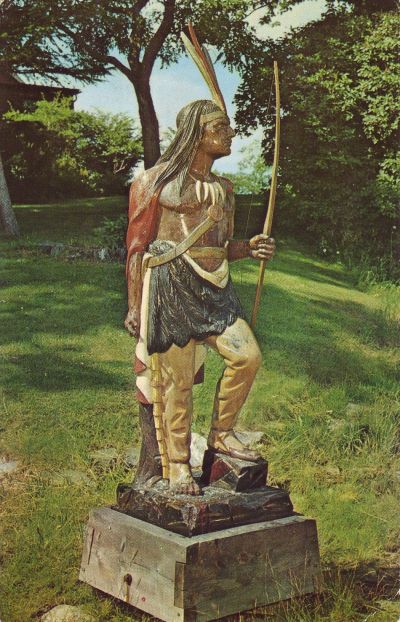
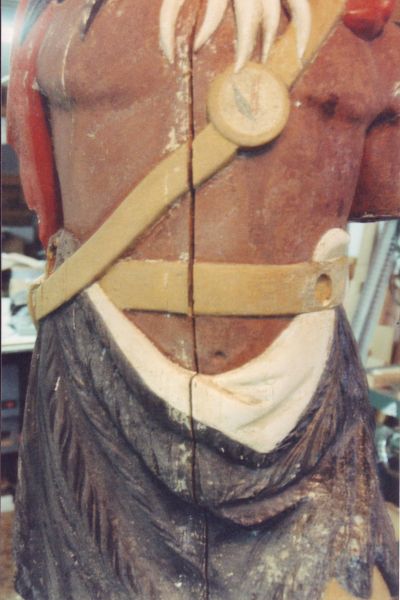
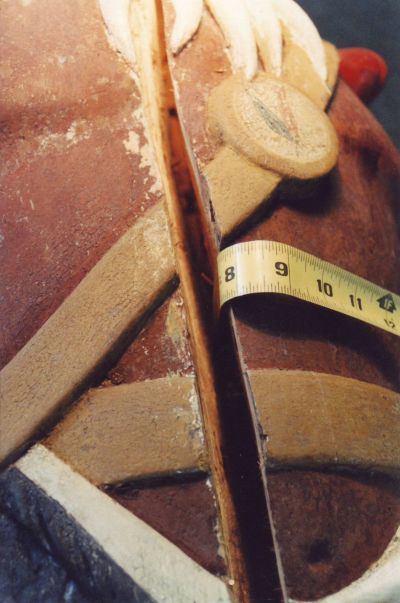
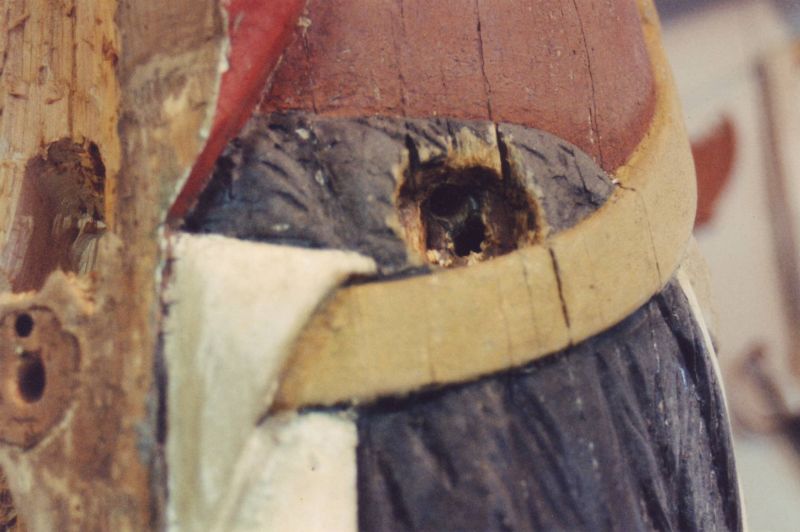
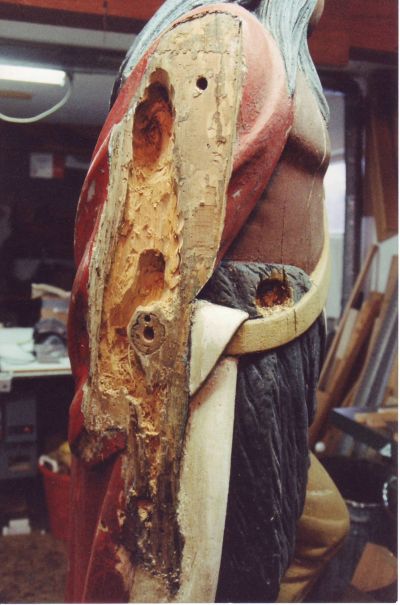
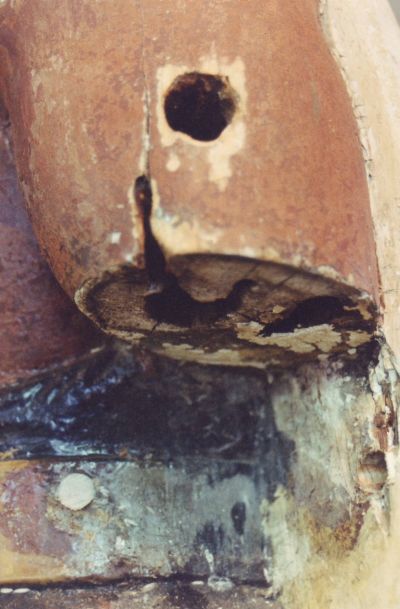
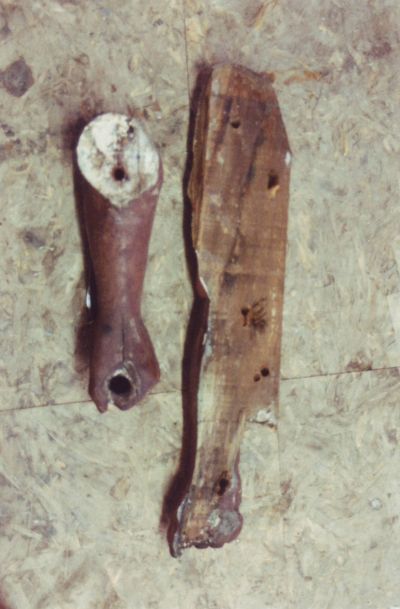
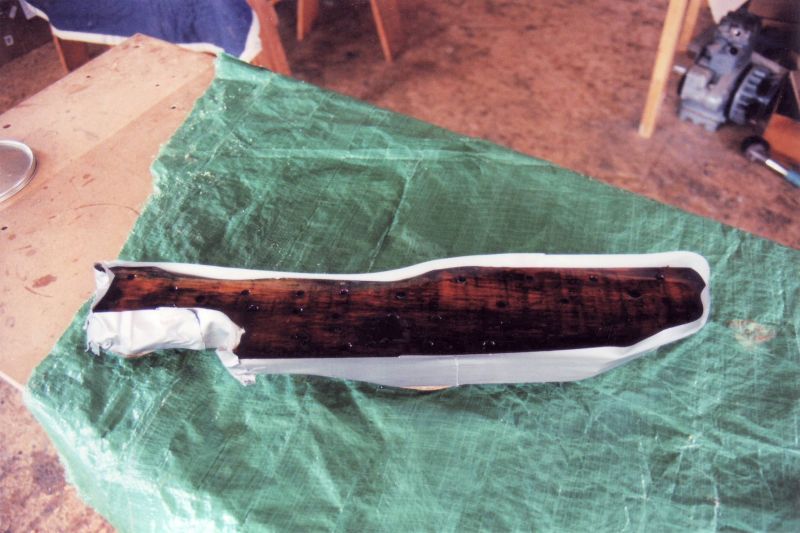
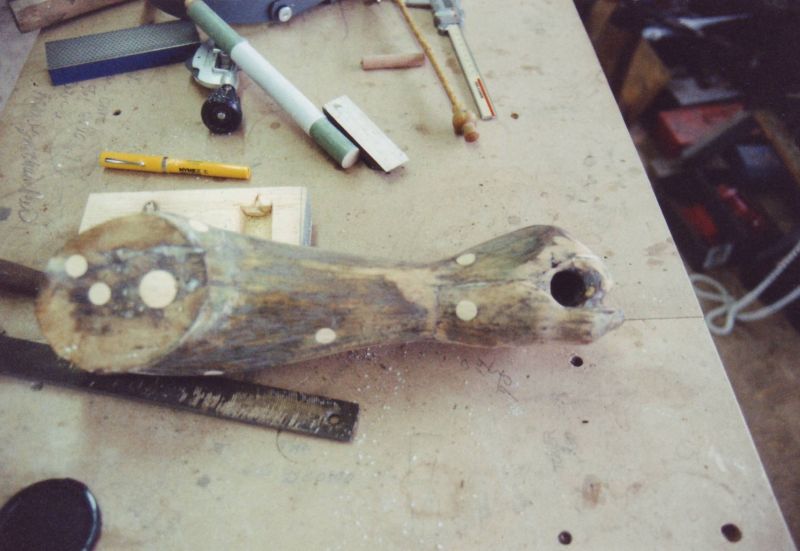
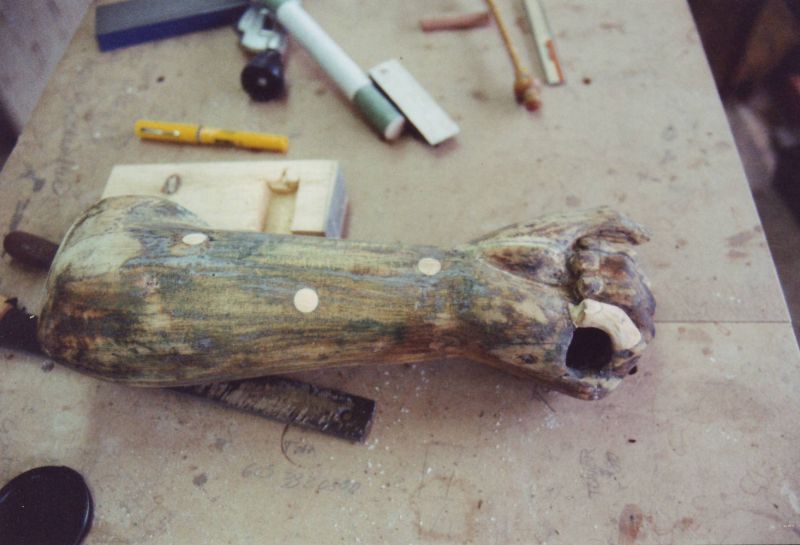
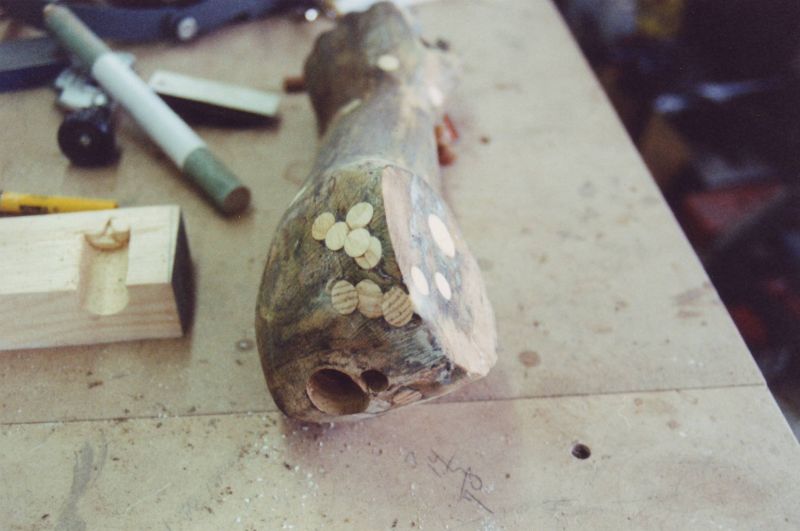
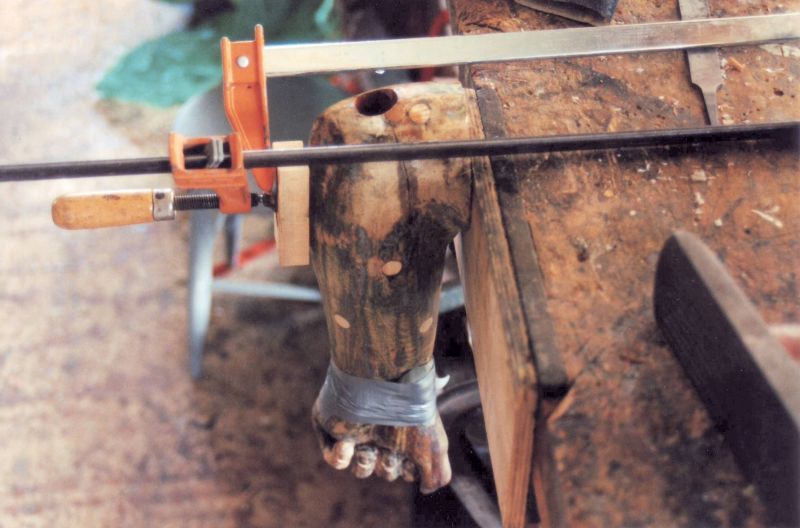
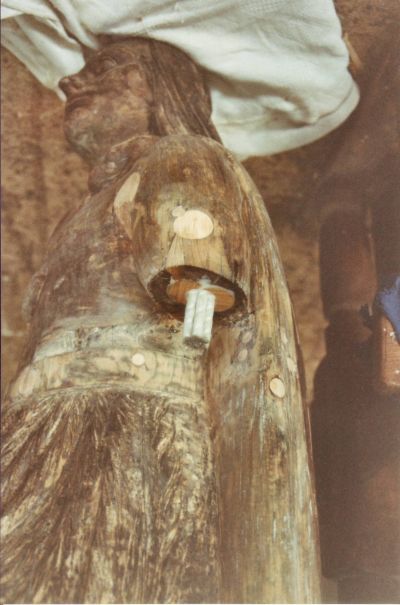
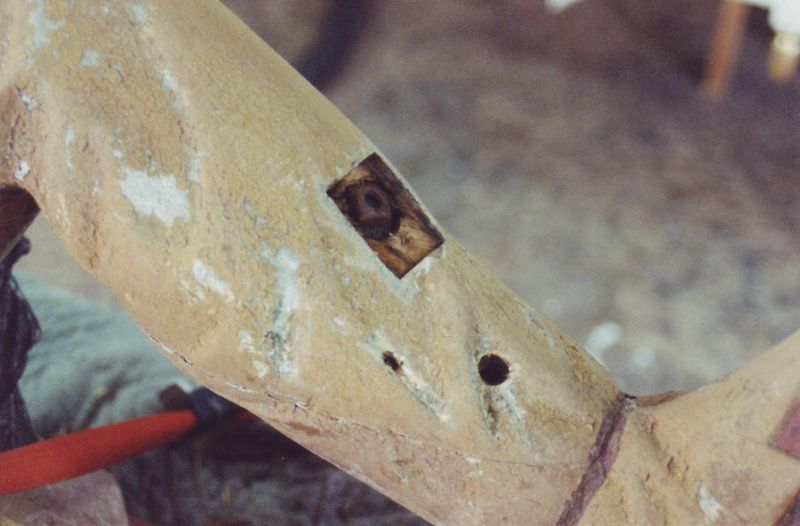
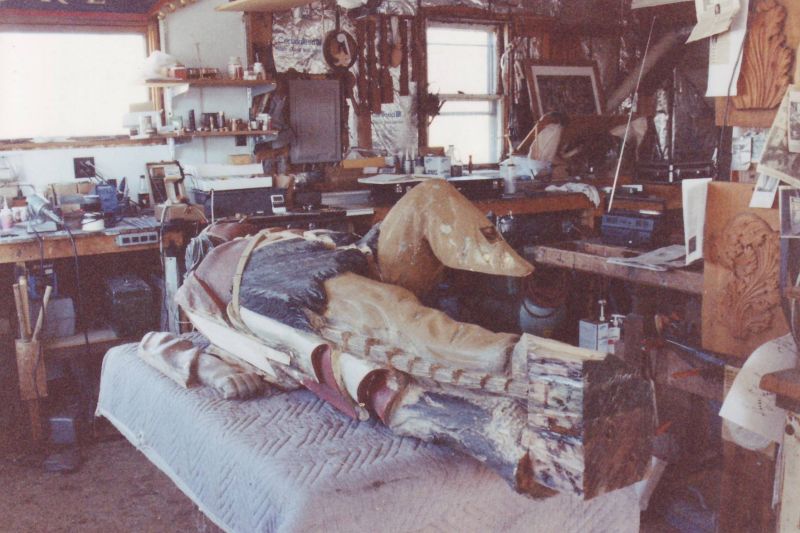
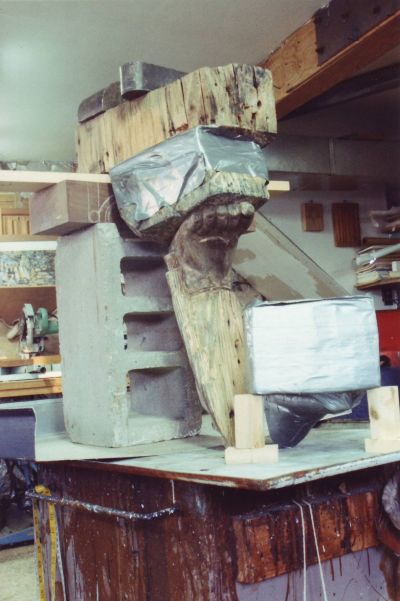
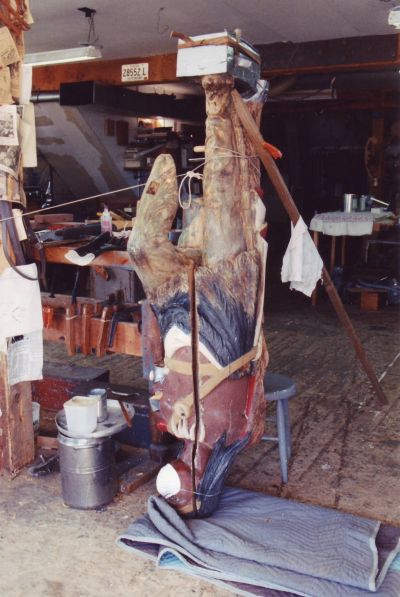
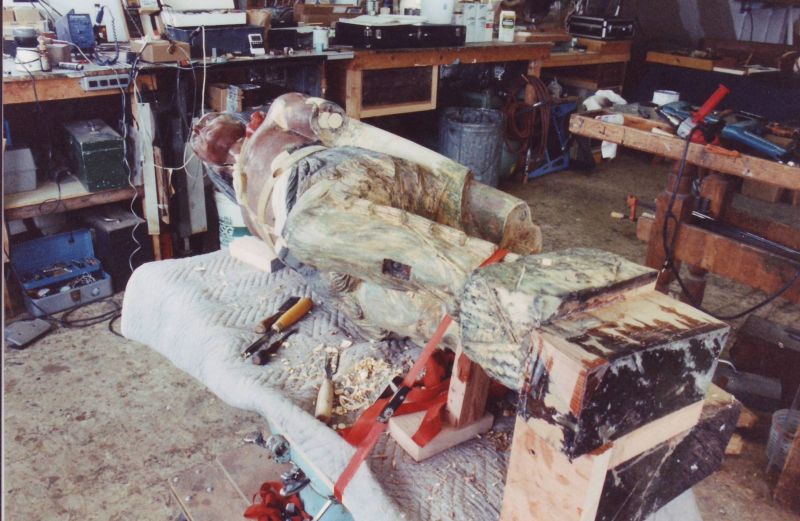
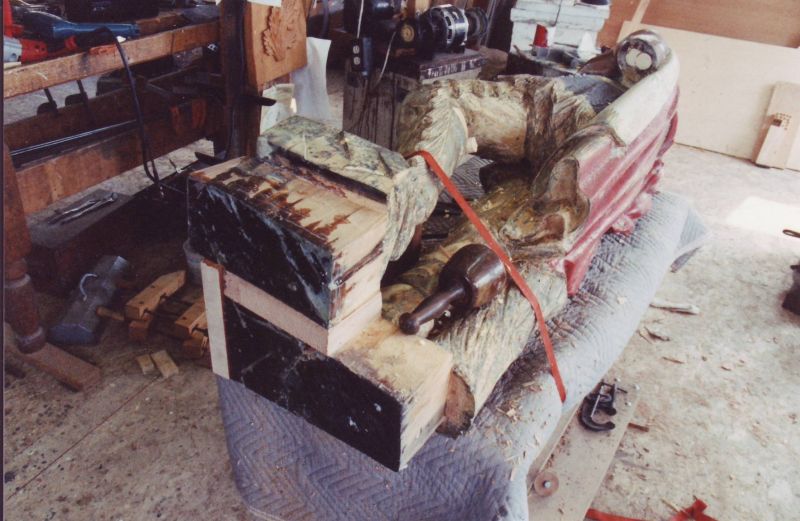
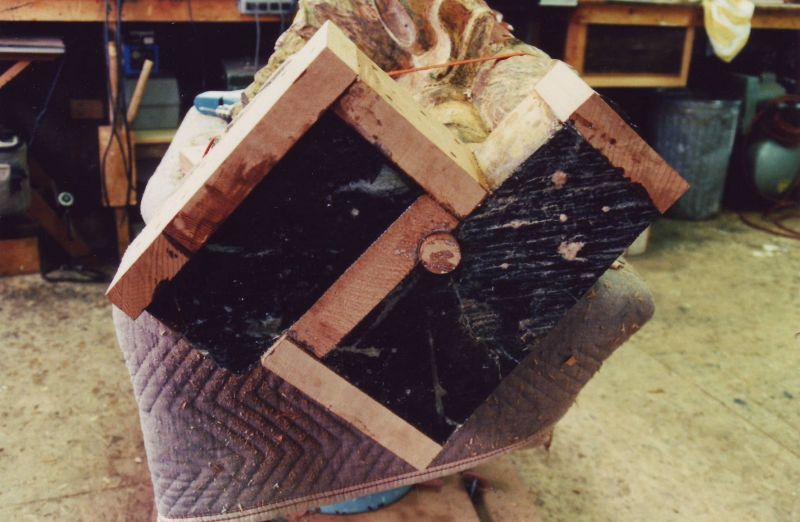
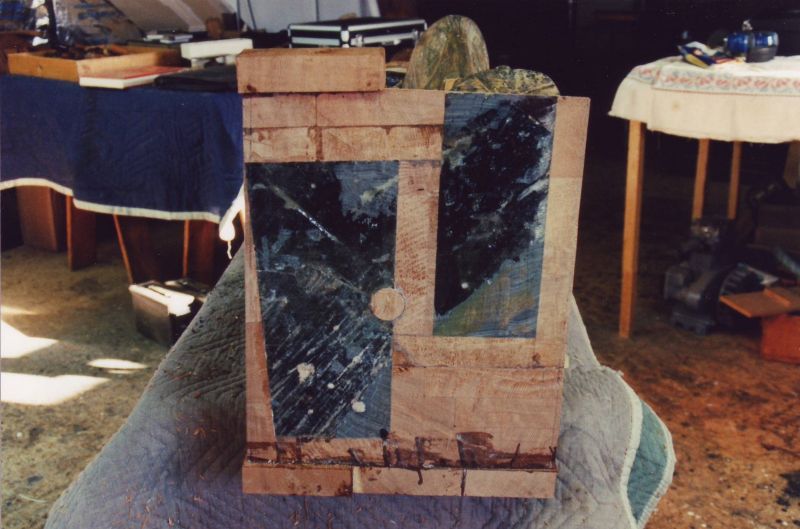
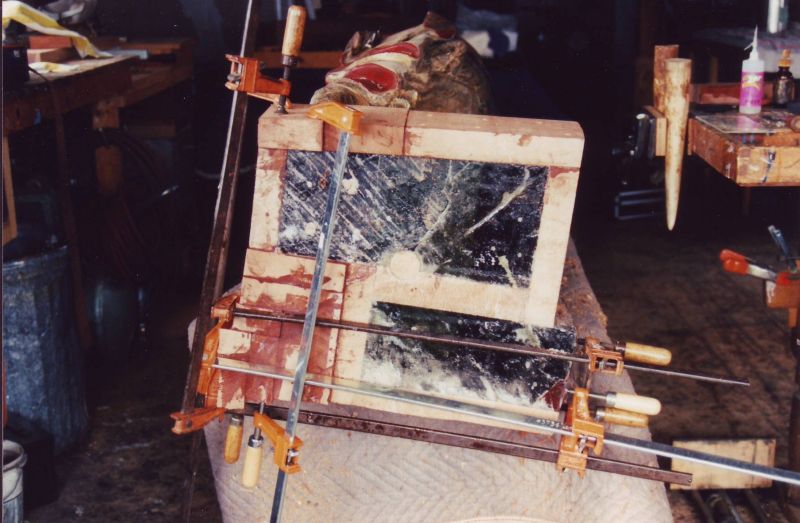
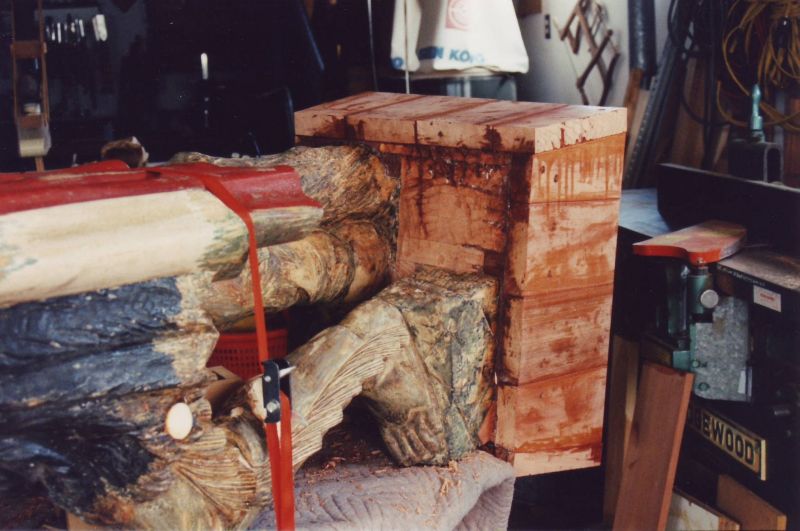
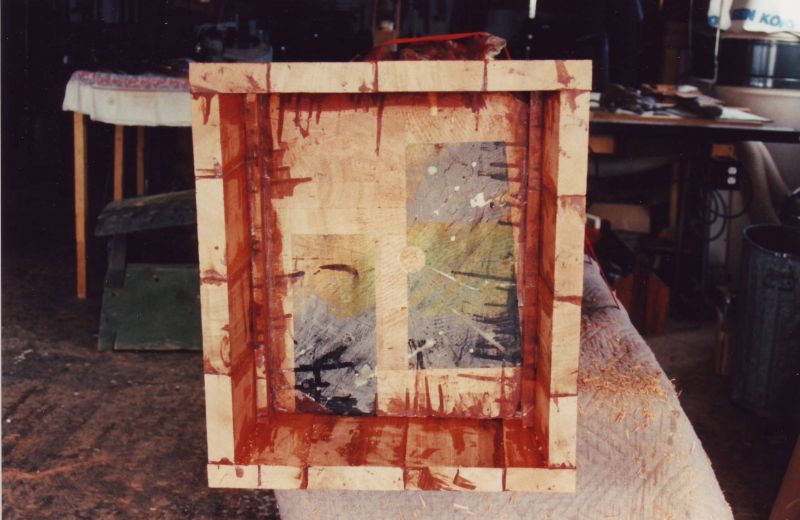
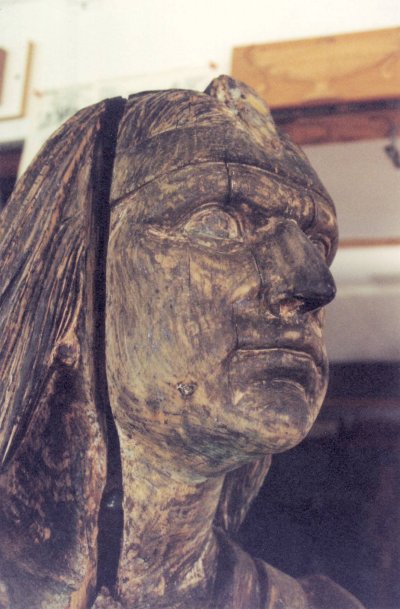
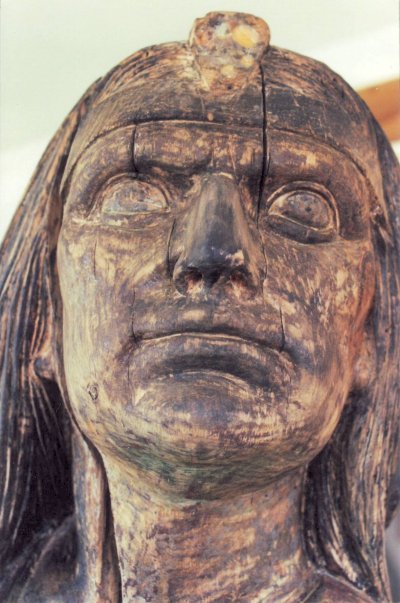
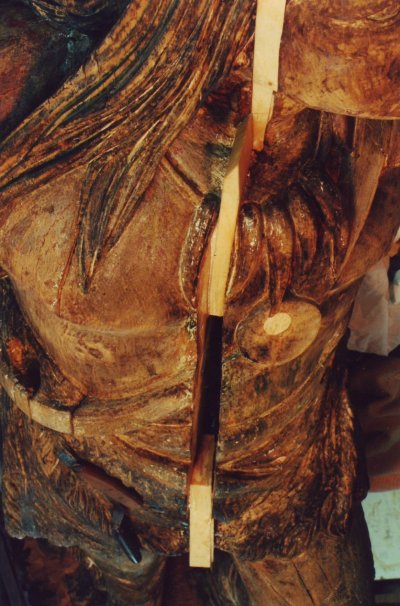
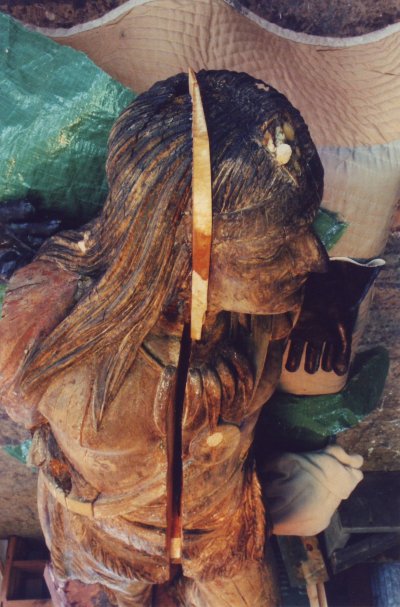
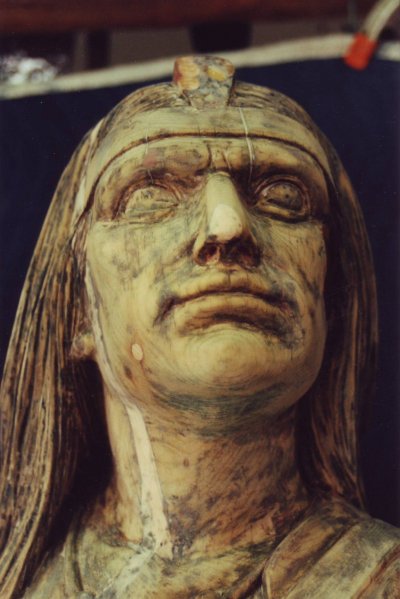
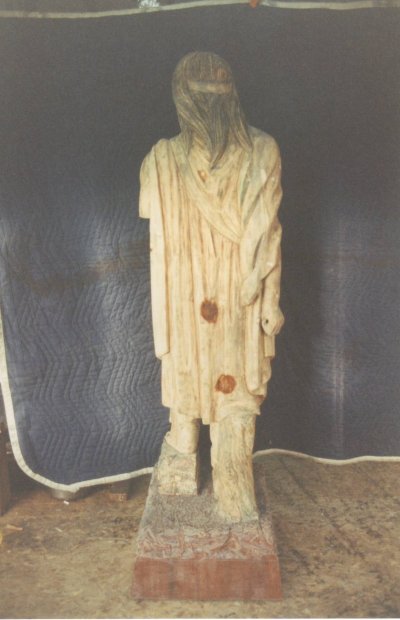
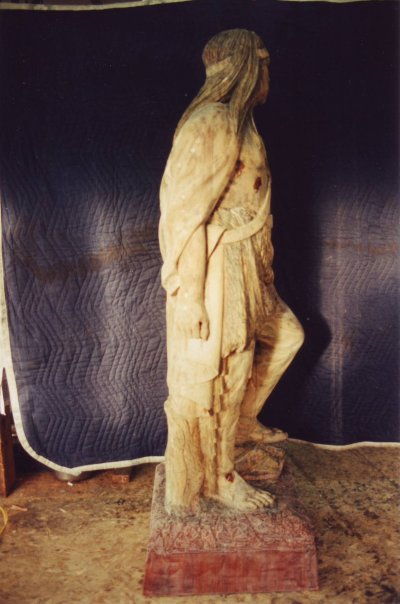
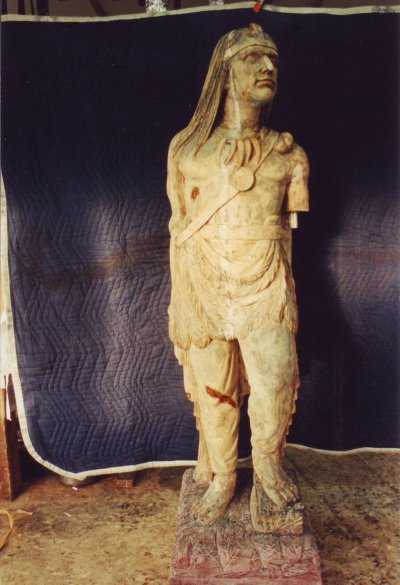
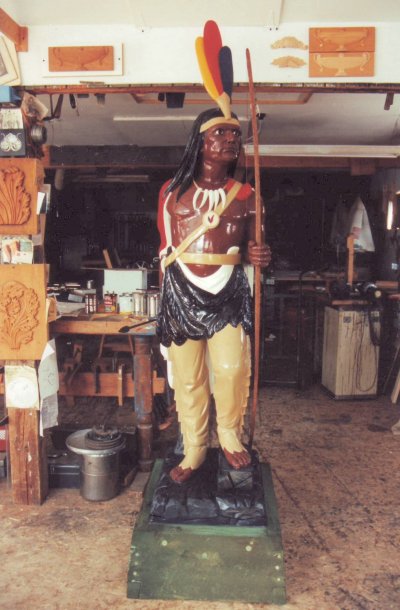
This beautifully carved wooden Indian was and still remains an historic icon of the The Museums of Old York. After many years of faithful service on the front lawn of one of the museum's prize properties, the Elizabeth Perkins House, he needed a bit of work. The carving was x-rayed by York Hospital to locate for removal all of the screws, nails, bolts and metal that had been used in past repair jobs.  I was given a free hand in the restoration of this magnificent piece with the idea that it would be going back to his place on the banks of the York River and be able to withstand the elements for another 100 years.


70.jpg (74331 bytes) 01a.jpg (41355 bytes) 02.jpg (42418 bytes) 03.jpg (57540 bytes) 04.jpg (46964 bytes) 05.jpg (42879 bytes)
 
Indian show figure as shown on an old, Old York Historic post card.
Front showing failed crack repair.
Old repair removed. Tape shows distance into the ant-hollowed body.  
Old bolt hole on the right.
The right arm was originally attached to the body with glue and nails. The attachment had failed and the arm removed to repair ant damage. 
Left forearm was originally attached  just above the elbow. This attachment had failed and the arm removed for repair.  


06.jpg (39145 bytes) 07.jpg (74221 bytes) 08.jpg (57537 bytes) 09.jpg (57758 bytes) 10.jpg (49908 bytes) 12.jpg (63254 bytes)
 
Left and right arms.
Right (arrow arm) with a duct tape dam, saturated with epoxy consolidant.
Top of left arm showing some repair work.
Inside and bottom of left arm showing little finger repair. The green broom handle in the background has a strip of Teflon sheeting glued around it. This was used to form the pocket in the hand for the bow. The fingers were no more than a thin, rotted shell.  
Elbow view. The arm is hollow to the palm, the wood a thin shell at the wrist and forearm. All this damage was caused by water and ants. 
Getting ready to plug the end of the elbow. The arm has been consolidated with a special epoxy and the Teflon covered broom handle removed. The duct tape is holding a green clay compression bandage to hold back the epoxy weeping through the thin, wooden skin.  


11.jpg (41740 bytes) 13.jpg (54427 bytes) 13a.jpg (80965 bytes) 14.jpg (42755 bytes) 15.jpg (98936 bytes) 16.jpg (49298 bytes)
 
Left upper arm stump showing fiberglass rebar tenon. This upper arm and shoulder area has been repaired with new wood and epoxy consolidated. 
Left shin showing bolt hole. The entire figure was x-rayed by York Hospital, the iron bolts and screws located and removed during the restoration. 
Lying on the bench with left leg and right foot off. 
Left shin, foot, wooden "rock" the foot stands on and what was left of the base. A duct tape dam around the rock contains the epoxy. 
The left leg and foot with what's left of the base. Once again duct tape forms the dam for the consolidant. 
The right leg's base is being worked on here and once again it's duct tape to the rescue. 


17.jpg (45464 bytes) 18.jpg (88570 bytes) 20.jpg (78346 bytes) 21.jpg (67818 bytes) 22.jpg (71202 bytes) 23.jpg (73537 bytes)
 
Left shin back on and the calf bolt holes repaired.
New wood being gluer between the left and right leg base blocks.
Adding more wood the the base.
Another view of the old, dark, epoxy consolidated base with new, lighter wood.  
Looking more rectangular now. The new, lighter wood is clear heart, vertical grain redwood. a very stable and wood that glues wonderfully. 
Another layer goes on.  


24.jpg (83702 bytes) 25.jpg (71945 bytes) 26.jpg (64734 bytes) 28.jpg (70752 bytes) 29.jpg (72926 bytes) 30.jpg (58034 bytes)
 
Last layer glued on.
Another perspective.
Looking up into the base. The round hole in the middle was drilled by the makers and the figure was suspended from iron bars inserted into this one and on in the top of the head. These holes mark the very center of the log the piece was carved out of.
 Thickened epoxy fillets filled the corners making the base even stronger. 
The top of the base was carved to resemble ledge.
Here the top of the base has been thoroughly saturated with consolidant.


31.jpg (54973 bytes) 32.jpg (55536 bytes) 33.jpg (61845 bytes) 34.jpg (96668 bytes) 35.jpg (67274 bytes) 36.jpg (62216 bytes)
The interior of the base is being consolidated in this picture. 
The paint has been stripped from the face and the old crack repair removed,
From the front. 
The top of the head showing the drilled hole. The figure was carved from the end of a log the rest of which was probably used as a mast or yard arm on a sailing ship. As you can see, all of the cracks radiate into the center of the log.
The interior of the crack being filled with wood. Care was taken to make sure the grain of the new wood matched the grain of the old. 
Another view of the crack repair.  


38.jpg (53890 bytes) 40.jpg (46097 bytes) 44.jpg (39830 bytes) 45.jpg (45326 bytes) 46.jpg (48807 bytes) 47.jpg (55467 bytes)
Another view of the crack repair work.
The crack has been fixed, carved and the piece is ready for the next step.
The next three pictures show the Elizabeth Perkins Indian with all holes and cracks repaired. Before the left arm went back on, the hollow body cavity was filled with epoxy consolidant. This was done through the hole in the head and took a few gallons.  The consolidant soaked into all rotted parts via angled, pre-drilled holes and ant chambers. Then the hole down through the top of the head, through the body crotch  was re-drilled to give the slow curing epoxy a bit of room to move.   
Three coats of primer and five coats of color with plenty of sanding in between finished things off. Show figures were originally painted with high gloss paint and sometimes with varnish over the paint to make them shine even more. People started carving figures out of wood to be used as advertisement in a world where not everyone was literate and shiny things were rare. Most horse-drawn circus wagons of this era were literally dripping with brilliant gold leaf. 


Boat Restoration
 

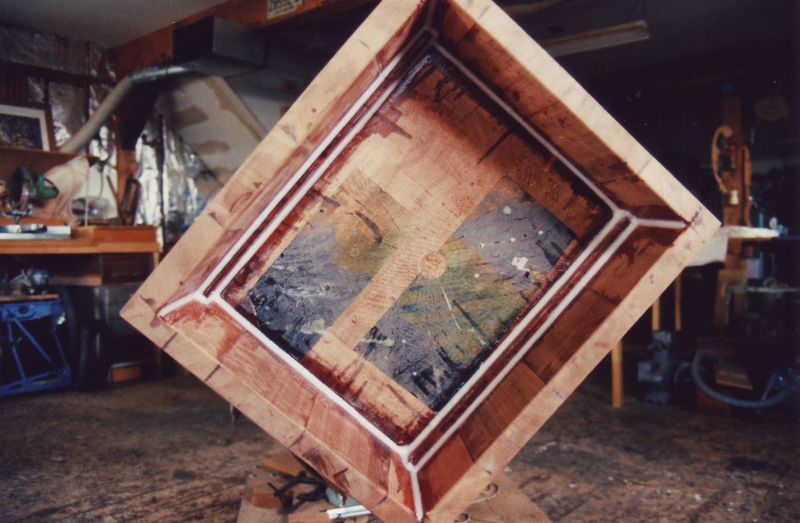
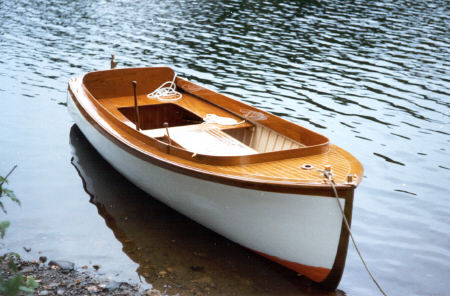
I started my woodworking career with boats in a local yacht yard at a time when most were still made out of wood.  I subsequently restored a few smaller antique wooden boats.  Here are two of them.


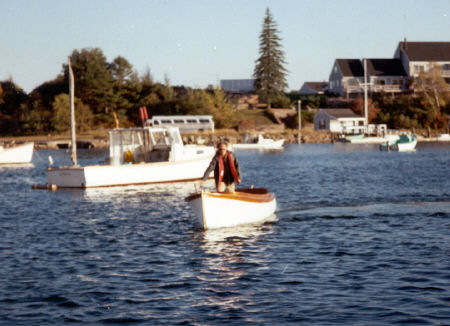
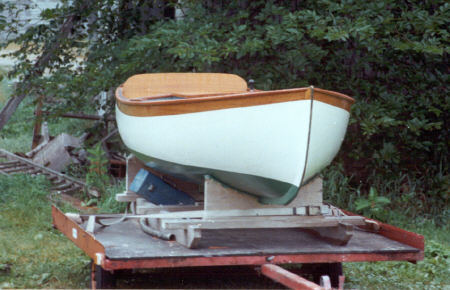
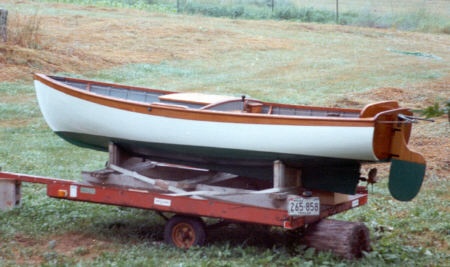
Tender to the yacht Felicia


Felicia b.jpg (41406 bytes) Felicia c.jpg (36239 bytes) Felicia, finding the waterline.jpg (38331 bytes) Felicia rudder.jpg (33768 bytes) Felicia engine hatch.jpg (47419 bytes) Felicia hatch detail.jpg (19283 bytes) Felicia bow on.jpg (47073 bytes)
 
Finding the waterline - from the bow.
Finding the waterline - from the port side.
On the trailer.
Port side, aft.
Teak engine hatch cover.
Hatch cover dove tail corner detail.
Ready to launch.


Felicia tender, York Harbor.jpg (27117 bytes) Felicia under way.jpg (38739 bytes)
 
Judge Dave Strater at the tiller in York Harbor, Maine.
This pretty little boat was featured in the January, 1980 issue of The Small Boat Journal.


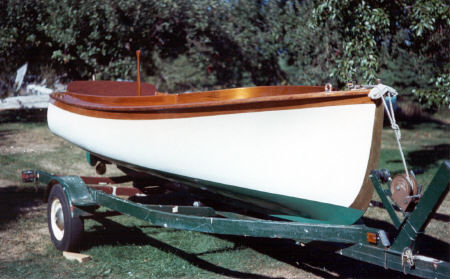
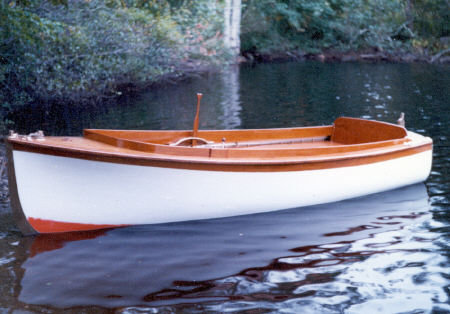
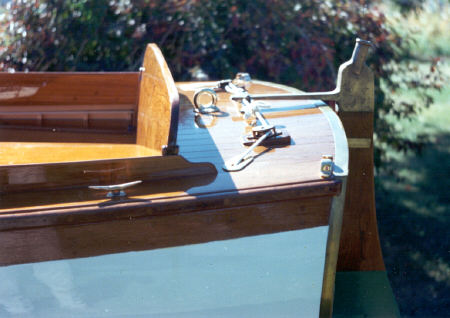
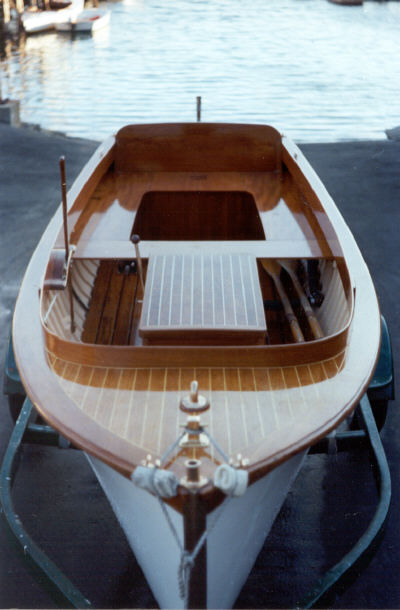
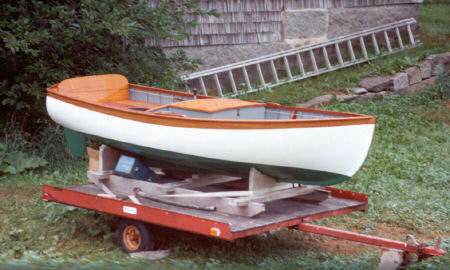
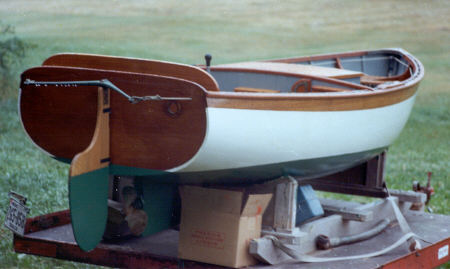
Restoration of a circa 1909 Lawley tender.


Lawley on trailer.jpg (37964 bytes) Lawley port side.jpg (33952 bytes) Lawley starboard side.jpg (37531 bytes) Lawley bow on.jpg (34230 bytes) Lawley stern.jpg (26384 bytes)
 
View from he bow.
Port Side.
Starboard Side.
Interior lay out, from the bow.
View from the stern showing the rudder.
This pretty little launch was restored using the procedures as was used for Felicia's tender. Please see below.


The yacht Felicia was built by the Bath Iron Works in Bath, Maine for senator Jesse Metcalf of Rhode Island and was launched in 1931.  She was 147 feet long and had a beam of 24 feet, 10 inches and displaced 378 tons and was the first diesel-electric powered yacht that Bath produced.  Two- 400 hp Cooper-Bessemer engines drove two generators  which in turn powered two propulsion motors that allowed the yacht to cruse at 17 knots in a 4000-mile radius. The Felicia was used by the Navy as a coastal picket boat during WWII. 


The launch to the yacht Felicia was a little over 15 feet long and lightly built with three eighths inch thick cedar plank riveted to 5/8 inch square frames.  All of the bright work is teak.  I replaced 16 frames, 2 floor timbers, two planks, teak cockpit combings, all of the floor boards, the engine, the engine box and its hatch. All of the seams were reefed of their calking and all bungs (wooden plugs) were popped off to expose the rivet heads.  The planks were tightened to the frames by bucking up the rivets on the outside of the planks and peening them down tight on their roves on the inside of the frames. Every fastener on the boat, including the keel bolts were tightened in this fashion.  She was then primed, calked, painted and varnished.  The edges of the stern were re-capped with brass plate as was the cut water on the bow. These brass caps were held on the same way the originals were - by small screws that were just slightly counter sunk into the brass and then ground off flush to the face of the caps and polished to a high shine. They looked like flush rivets when they were completed.


Home ] Carving ] Signs ] Pattern Making ] Turning ] [ Restoration ] National Archives ] Bagpipes & Bellows ] Sculpture ] Bellamy Eagles ]


Top of Page